您正在查看: 2018年6月

EOS rpc list_keys Error 500

  • EOS版本:v1.0+
  • 问题:执行curl http://192.168.1.168:8888/v1/wallet/list_keys
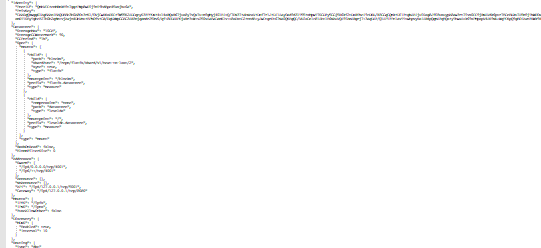
    返回
    {"code":500,"message":"Internal Service Error","error":{"code":7,"name":"bad_cast_exception","what":"Bad Cast","details":[{"message":"Invalid cast from object_type to Array","file":"variant.cpp","line_number":535,"method":"get_array"}]}}
  • 错误分析:
    list_keys now requires an argument, which is your wallet password.
    修正请求
    curl --request POST --url http://192.168.1.112:8888/v1/wallet/list_keys --data '["default","PW5K2Rg4rSYanxx..."]'

    正确返回对应钱包内所有公钥私钥。


  • 常见问题(Wallet not found: default):
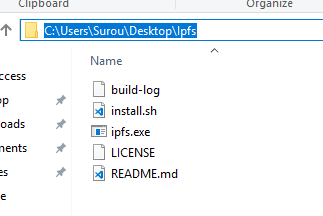
    EOS 1.0 release 之前如果创建钱包是用的默认创建命令
    cleos wallet create

    钱包位置是在/home/surou/eosio-wallet/./default.wallet
    可以用cleos wallet create再次创建 查看当前钱包文件位置。
    但是 wallet_api_plugin 查找的位置是在 /home/surou/.local/share/eosio/nodeos/data/./default.wallet(1.0 release左右之后 config.ini wallet-dir = ".")

  • 简单粗暴有效
    cp /home/surou/eosio-wallet/./default.wallet /home/surou/.local/share/eosio/nodeos/data/

IPFS 介绍及Windows系统下环境搭建使用

IPFS(InterPlanetary File System)是一个点对点的分布式超媒体分发协议,它整合了过去几年最好的分布式系统思路,为所有人提供全球统一的可寻址空间,包括Git、自证明文件系统SFS、BitTorrent和DHT,同时也被认为是最有可能取代HTTP的新一代互联网协议。

IPFS用基于内容的寻址替代传统的基于域名的寻址,用户不需要关心服务器的位置,不用考虑文件存储的名字和路径。我们将一个文件放到IPFS节点中,将会得到基于其内容计算出的唯一加密哈希值。哈希值直接反映文件的内容,哪怕只修改1比特,哈希值也会完全不同。当IPFS被请求一个文件哈希时,它会使用一个分布式哈希表找到文件所在的节点,取回文件并验证文件数据。

IPFS是通用目的的基础架构,基本没有存储上的限制。大文件会被切分成小的分块,下载的时候可以从多个服务器同时获取。IPFS的网络是不固定的、细粒度的、分布式的网络,可以很好的适应内容分发网络的要求。这样的设计可以很好的共享各类数据,包括图像、视频流、分布式数据库、整个操作系统、模块链、8英寸软盘的备份,还有静态网站。

1、下载IPFS
  • 打开官网https://ipfs.io/ ,点击Try it
  • 点击 Install IPFS now
  • 开始下载
  • 下载对应版本的IPFS安装文件
  • 下载完之后,将文件解压
    2.安装IPFS
  • 打开CMD,进入IPFS解压目录
  • 初始化 ipfs网络环境
    ipfs init


    并且系统会分配一个属于你自己的IPFS网络哈希值(类似你在IPFS网络中的一张身份证ID)。有了这个ID,别人就可以访问到你的节点。
    输入

    ipfs cat /ipfs/QmS4ustL54uo8FzR9455qaxZwuMiUhyvMcX9Ba8nUH4uVv/readme

    出现Hello and Welcome to IPFS! 那恭喜你!说明你的电脑已经成功安装IPFS并已经加入到IPFS网络了。

    3.IPFS系统配置
  • 查找配置
    IPFS的初始化配置在当前系统的用户目录
  • 打开config配置文件

    具体的配置参数以及如何修改,此处不做具体说明,请参考官网
    4.服务运行

    输入ipfs daemon启动IPFS服务监听,用于监听IPFS网络通信数据,默认使用的监听端口是5001,请确保此端口不被占用。也可自行修改config配置

    "API": "/ip4/127.0.0.1/tcp/5001",
    "Gateway": "/ip4/127.0.0.1/tcp/8080"

    5.IPFS使用测试

    重新打开另一CMD,并进入IPFS文件目录
    使用ipfs help获取常用命令参数

C:\Users\Surou\Desktop\Ipfs>ipfs help
USAGE
  ipfs - Global p2p merkle-dag filesystem.

  ipfs [--config=<config> | -c] [--debug=<debug> | -D] [--help=<help>] [-h=<h>] [--local=<local> | -L] [--api=<api>] <command> ...

SUBCOMMANDS
  BASIC COMMANDS
    init          Initialize ipfs local configuration
    add <path>    Add a file to IPFS
    cat <ref>     Show IPFS object data
    get <ref>     Download IPFS objects
    ls <ref>      List links from an object
    refs <ref>    List hashes of links from an object

  DATA STRUCTURE COMMANDS
    block         Interact with raw blocks in the datastore
    object        Interact with raw dag nodes
    files         Interact with objects as if they were a unix filesystem
    dag           Interact with IPLD documents (experimental)

  ADVANCED COMMANDS
    daemon        Start a long-running daemon process
    mount         Mount an IPFS read-only mountpoint
    resolve       Resolve any type of name
    name          Publish and resolve IPNS names
    key           Create and list IPNS name keypairs
    dns           Resolve DNS links
    pin           Pin objects to local storage
    repo          Manipulate the IPFS repository
    stats         Various operational stats
    p2p           Libp2p stream mounting
    filestore     Manage the filestore (experimental)

  NETWORK COMMANDS
    id            Show info about IPFS peers
    bootstrap     Add or remove bootstrap peers
    swarm         Manage connections to the p2p network
    dht           Query the DHT for values or peers
    ping          Measure the latency of a connection
    diag          Print diagnostics

  TOOL COMMANDS
    config        Manage configuration
    version       Show ipfs version information
    update        Download and apply go-ipfs updates
    commands      List all available commands

  Use 'ipfs <command> --help' to learn more about each command.

  ipfs uses a repository in the local file system. By default, the repo is
  located at ~/.ipfs. To change the repo location, set the $IPFS_PATH
  environment variable:

    export IPFS_PATH=/path/to/ipfsrepo

  EXIT STATUS

  The CLI will exit with one of the following values:

  0     Successful execution.
  1     Failed executions.

ipfs id,可以查看你的通信ID信息

使用ipfs swarm peers 可以查看附近也在使用IPFS网络节点伙伴,可以发现不是你一个人在战斗

6.访问IPFS网络中的某一文件

Ubuntu 搭建Shadowsocks server

本篇文章只站在软件本身安装的角度,讲述如何搭建Shadowsocks服务端。

  • OS:Ubuntu 16.04及以上版本
  • 腾讯云服务器
1.首先安装Shadowsocks相关依赖及程序
sudo apt-get install python-pip
sudo apt-get install python-m2crypto
sudo pip install shadowsocks
2.配置config文件
mkdir /etc/shadowsocks
vim /etc/shadowsocks/config.json
3.编辑配置
{
    "server":"",  ##填写服务器外网ip地址,ip也可以写内网地址。
    "server_port":8000,
    "local_address":"127.0.0.1",
    "local_port":1080,
    "port_password":{  ##访问密码,可以多个端口:密码
        "8000":"123456",
        "8001":"123456"
    }, 
    "timeout":300,
    "method":"aes-256-cfb",
    "fast_open":false
}
像腾讯云服务器这种,大都是内网服务器再通过公网ip转发的,所以server填写腾讯云的内网ip
4.查询内网ip
ifconfig

5.启动Shadowsocks服务 (-d 后台启动)
sudo ssserver -c config.json -d start

6.添加开机启动
vi /etc/rc.local

ssserver -c /etc/shadowsocks/config.json -d start

添加到rc.local底部

EOS Dapp开发入门

基于EOS的Dapp就是html页面通过调用eosjs与EOS链进行RPC通信,进行合约执行与数据交换。


下面演示Hello合约的Dapp调用
合约源代码
//hello.cpp

#include <eosiolib/eosio.hpp>
using namespace eosio;

class hello : public eosio::contract {
  public:
      using contract::contract;

      /// @abi action 
      void hi( account_name user ) {
         print( "Hello, ", name{user} );
      }
};

EOSIO_ABI( hello, (hi) )

合约部署参考(零基础部署测试合约(三)---合约部署

html 调用js关键代码

import EOS from 'eosjs'
const EOS_CONFIG = {
  contractName: "dapp.token", // Contract name
  contractReceiver: "dapp.exec", // User executing the contract (should be paired with private key)
  clientConfig: {
    keyProvider: '5JC9FdRjX3c3fsB62S5Tz22LgTuRHegb1XEV16uft8u3njmm9E5', // Your private key
    httpEndpoint: 'http://192.168.1.112:8888', // EOS http endpoint
    chainId: '706a7ddd808de9fc2b8879904f3b392256c83104c1d544b38302cc07d9fca477'
  }
}
//执行合约
DoContract(){
let eosClient = EOS(EOS_CONFIG.clientConfig)
    eosClient.contract(EOS_CONFIG.contractName)
      .then((contract) => {
        contract.hi(EOS_CONFIG.contractReceiver, { authorization: [EOS_CONFIG.contractReceiver] })
          .then((res) => { console.log("Success") })
          .catch((err) => {console.log("Fail"); console.log(err) })
      })
}

EOS账户权限的使用

从前一篇文章讲解了EOS账户权限介绍以及增删改查
下面介绍下账户权限的使用
基于上篇第5步(为bcskill账号增加自定义权限组custom,基于active )开始进行

1.首先先给账号bcskill转点SYS代币

发币步骤请参考(零基础EOS 节点部署,BP出块(三)-->开始部署),这里就不多做介绍

cleos push action eosio.token transfer '["eosio", "bcskill","1000.0000 SYS","bcskill"]' -p eosio

2.查询bcskill账户余额
cleos get currency balance eosio.token bcskill

3.用bcskill账号已custom权限转账给eosio
cleos push action eosio.token transfer '["bcskill", "eosio","100.0000 SYS","bcskill"]' -p bcskill@custom

4.custom权限组绑定transfer action
cleos set action permission bcskill eosio.token transfer custom

5.用bcskill账号已custom权限转账给eosio
cleos push action eosio.token transfer '["bcskill", "eosio","100.0000 SYS","bcskill"]' -p bcskill@custom

6.查询bcskill账户余额
cleos get currency balance eosio.token bcskill

经过两篇文章我们可以看出EOS的权限管理非常灵活。